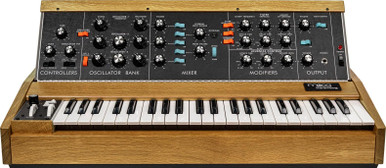
How to Build Your First Hardware Synth Setup
A first hardware synth setup does not need to look like a wall of instruments. It needs one clear way to make sound, one reliable way to hear it and a simple route to capture an idea. Every extra box should solve a problem you have actually experienced.
The easiest mistake is to buy several exciting instruments before deciding how they will be played, mixed, synchronised and recorded. Build the signal path first. When the basic setup works without friction, expansion becomes a musical decision instead of a cable emergency.
The smallest complete setup
| You need | What it does | Minimum practical choice |
|---|---|---|
| One sound source | Creates the musical part | Keyboard synth, groovebox or sampler |
| Monitoring | Lets you hear clearly | Suitable headphones or powered monitors |
| Audio path | Carries sound to your ears or recorder | Direct headphone output, mixer or audio interface |
| Power | Runs every device safely | Correct manufacturer supply or specified USB power |
| Cables | Connects audio and control | Only the exact types required by the chosen devices |
| Recording | Captures the performance | Phone/portable recorder where suitable, or an audio interface and computer |
Step 1: decide what the setup is for
Write one sentence before shopping. For example: “I want to play chords and design sounds away from a computer,” “I want to programme techno patterns with drums and bass,” or “I want a hands-on front end for the software I already use.”
That sentence determines the centre of the system. A polyphonic keyboard synth fits the first example. A groovebox or drum machine plus bass synth fits the second. A MIDI controller and audio interface may fit the third better than another sound module.
Use Which Type of Synthesizer Do I Actually Need? to choose the centre
Step 2: choose one main instrument
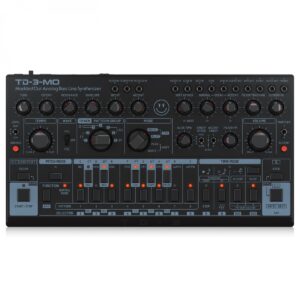
Start with the device that can make the largest useful part of your music by itself. That may be a keyboard synth capable of basses, chords and leads, or a groovebox capable of drums and several melodic tracks. A highly specialised bass module can be inspiring, but it may not be a complete first setup unless bass is the entire reason you are buying hardware.
Check what is included. Some desktop devices need an external MIDI keyboard. Some instruments have no built-in speaker. Some use a small TRS MIDI socket that requires an adaptor. Some can be powered over USB but introduce noise when audio and power share a hub. The product page, manual and rear-panel photograph should agree with your plan before purchase.
Step 3: decide how you will hear it
Headphones first
Headphones are the simplest monitoring route when the instrument has a proper headphone output. They remove the need for a mixer or interface during the first session and let you learn the instrument before solving room acoustics.
Use the headphone socket, not a single line output, and begin with the volume low. If you later connect several instruments, a small mixer or audio interface with headphone monitoring will become more practical.
Powered monitors
Studio monitors need line-level audio and mains power. Connect them from a suitable interface or mixer, or directly from the synth only when the output format and level are appropriate. Do not rely on turning two separate speaker volume controls every time you change instruments.
Step 4: choose a recording route
One instrument and a computer
An audio interface with two line inputs is a useful starting point. A stereo synth can occupy both inputs; a mono synth needs one. Connect the interface to the computer, create an audio track, select the correct input and set the level so strong notes do not clip.
Several instruments
A mixer lets several devices remain connected and balances them for jamming. To record every instrument separately at the same time, you need an interface or mixer-interface with enough independent computer channels. A simple stereo mixer records the combined performance as one stereo track, which is easy but leaves less control during mixing.
No computer
A portable recorder, sampler or groovebox with audio recording can capture a stereo mix. Confirm that the input accepts the mixer’s level and connector type. Make a short test recording, play it back through the same monitoring system and check for distortion or missing channels before attempting a full performance.
Step 5: add rhythm or sequencing only when it is needed
If the first synth already has a sequencer, use it. Learn how to enter notes, change pattern length, set tempo and save the result. Add a drum machine when a separate rhythmic workflow would improve the music, or a groovebox when you need several arranged parts rather than another single sound.
The second instrument creates three new requirements: its audio must be mixed, its tempo may need to be synchronised and its power supply needs space. Those practical needs are normal, but they are the reason to expand one device at a time.
Step 6: connect control and clock
MIDI can carry notes, controller movements, programme changes, transport commands and clock. Audio is separate. Connect the MIDI output of the device that controls the performance to the MIDI input of the device that should respond, then set the receiving channel. For tempo, choose one master clock and set every other sequencer to receive external clock.
USB can carry MIDI and sometimes audio, but the exact functions depend on the device. Traditional five-pin MIDI is often the clearest route between two hardware boxes. Small TRS MIDI sockets need the correct Type A or Type B adaptor; the plugs can look identical while being wired differently.
Follow the complete synchronisation guide
Step 7: plan power and cables
Use the voltage, polarity and current specified by the manufacturer. A connector that physically fits is not proof that a power supply is safe. Label each supply when several similar adapters live under the desk.
Buy cables to a written connection plan. For each stereo instrument, identify whether it uses two separate line outputs or a single stereo socket. For MIDI, identify five-pin DIN, 3.5 mm TRS and the adaptor type. Keep audio, MIDI, sync and USB cables described separately so one category is not mistaken for another.
Three first setups that make sense
Setup A: one keyboard synth
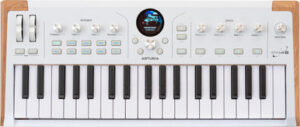
Polyphonic keyboard synthesizer
Headphones
Correct power supply
Later: audio interface and two line cables for recording
This is the cleanest route for learning synthesis and playing. It has almost no routing decisions and can expand when recording becomes important.
Setup B: groovebox as the centre
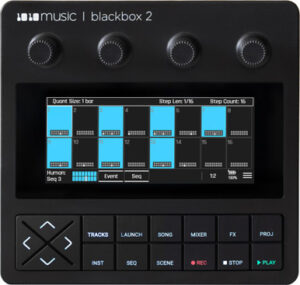
Groovebox with drums and melodic tracks
Headphones or powered monitors through an interface
Later: one characterful mono synth connected by MIDI and audio
This route suits pattern-based music. The groovebox can remain the master clock and sequencer as a specialist synth is added.
Setup C: synth and drum machine
One keyboard or desktop synth
One drum machine
Small mixer or two-input-plus audio interface, depending on mono/stereo requirements
MIDI or sync cable for tempo
This is a satisfying hands-on pair, but check the input count carefully. Two stereo devices need four mono mixer or interface inputs if both are to remain stereo.
Read next
Which Type of Synthesizer Do I Actually Need?
Five of the Best Beginner Synthesizers in 2026
How to Connect and Synchronise Synthesizers, Drum Machines and Grooveboxes